

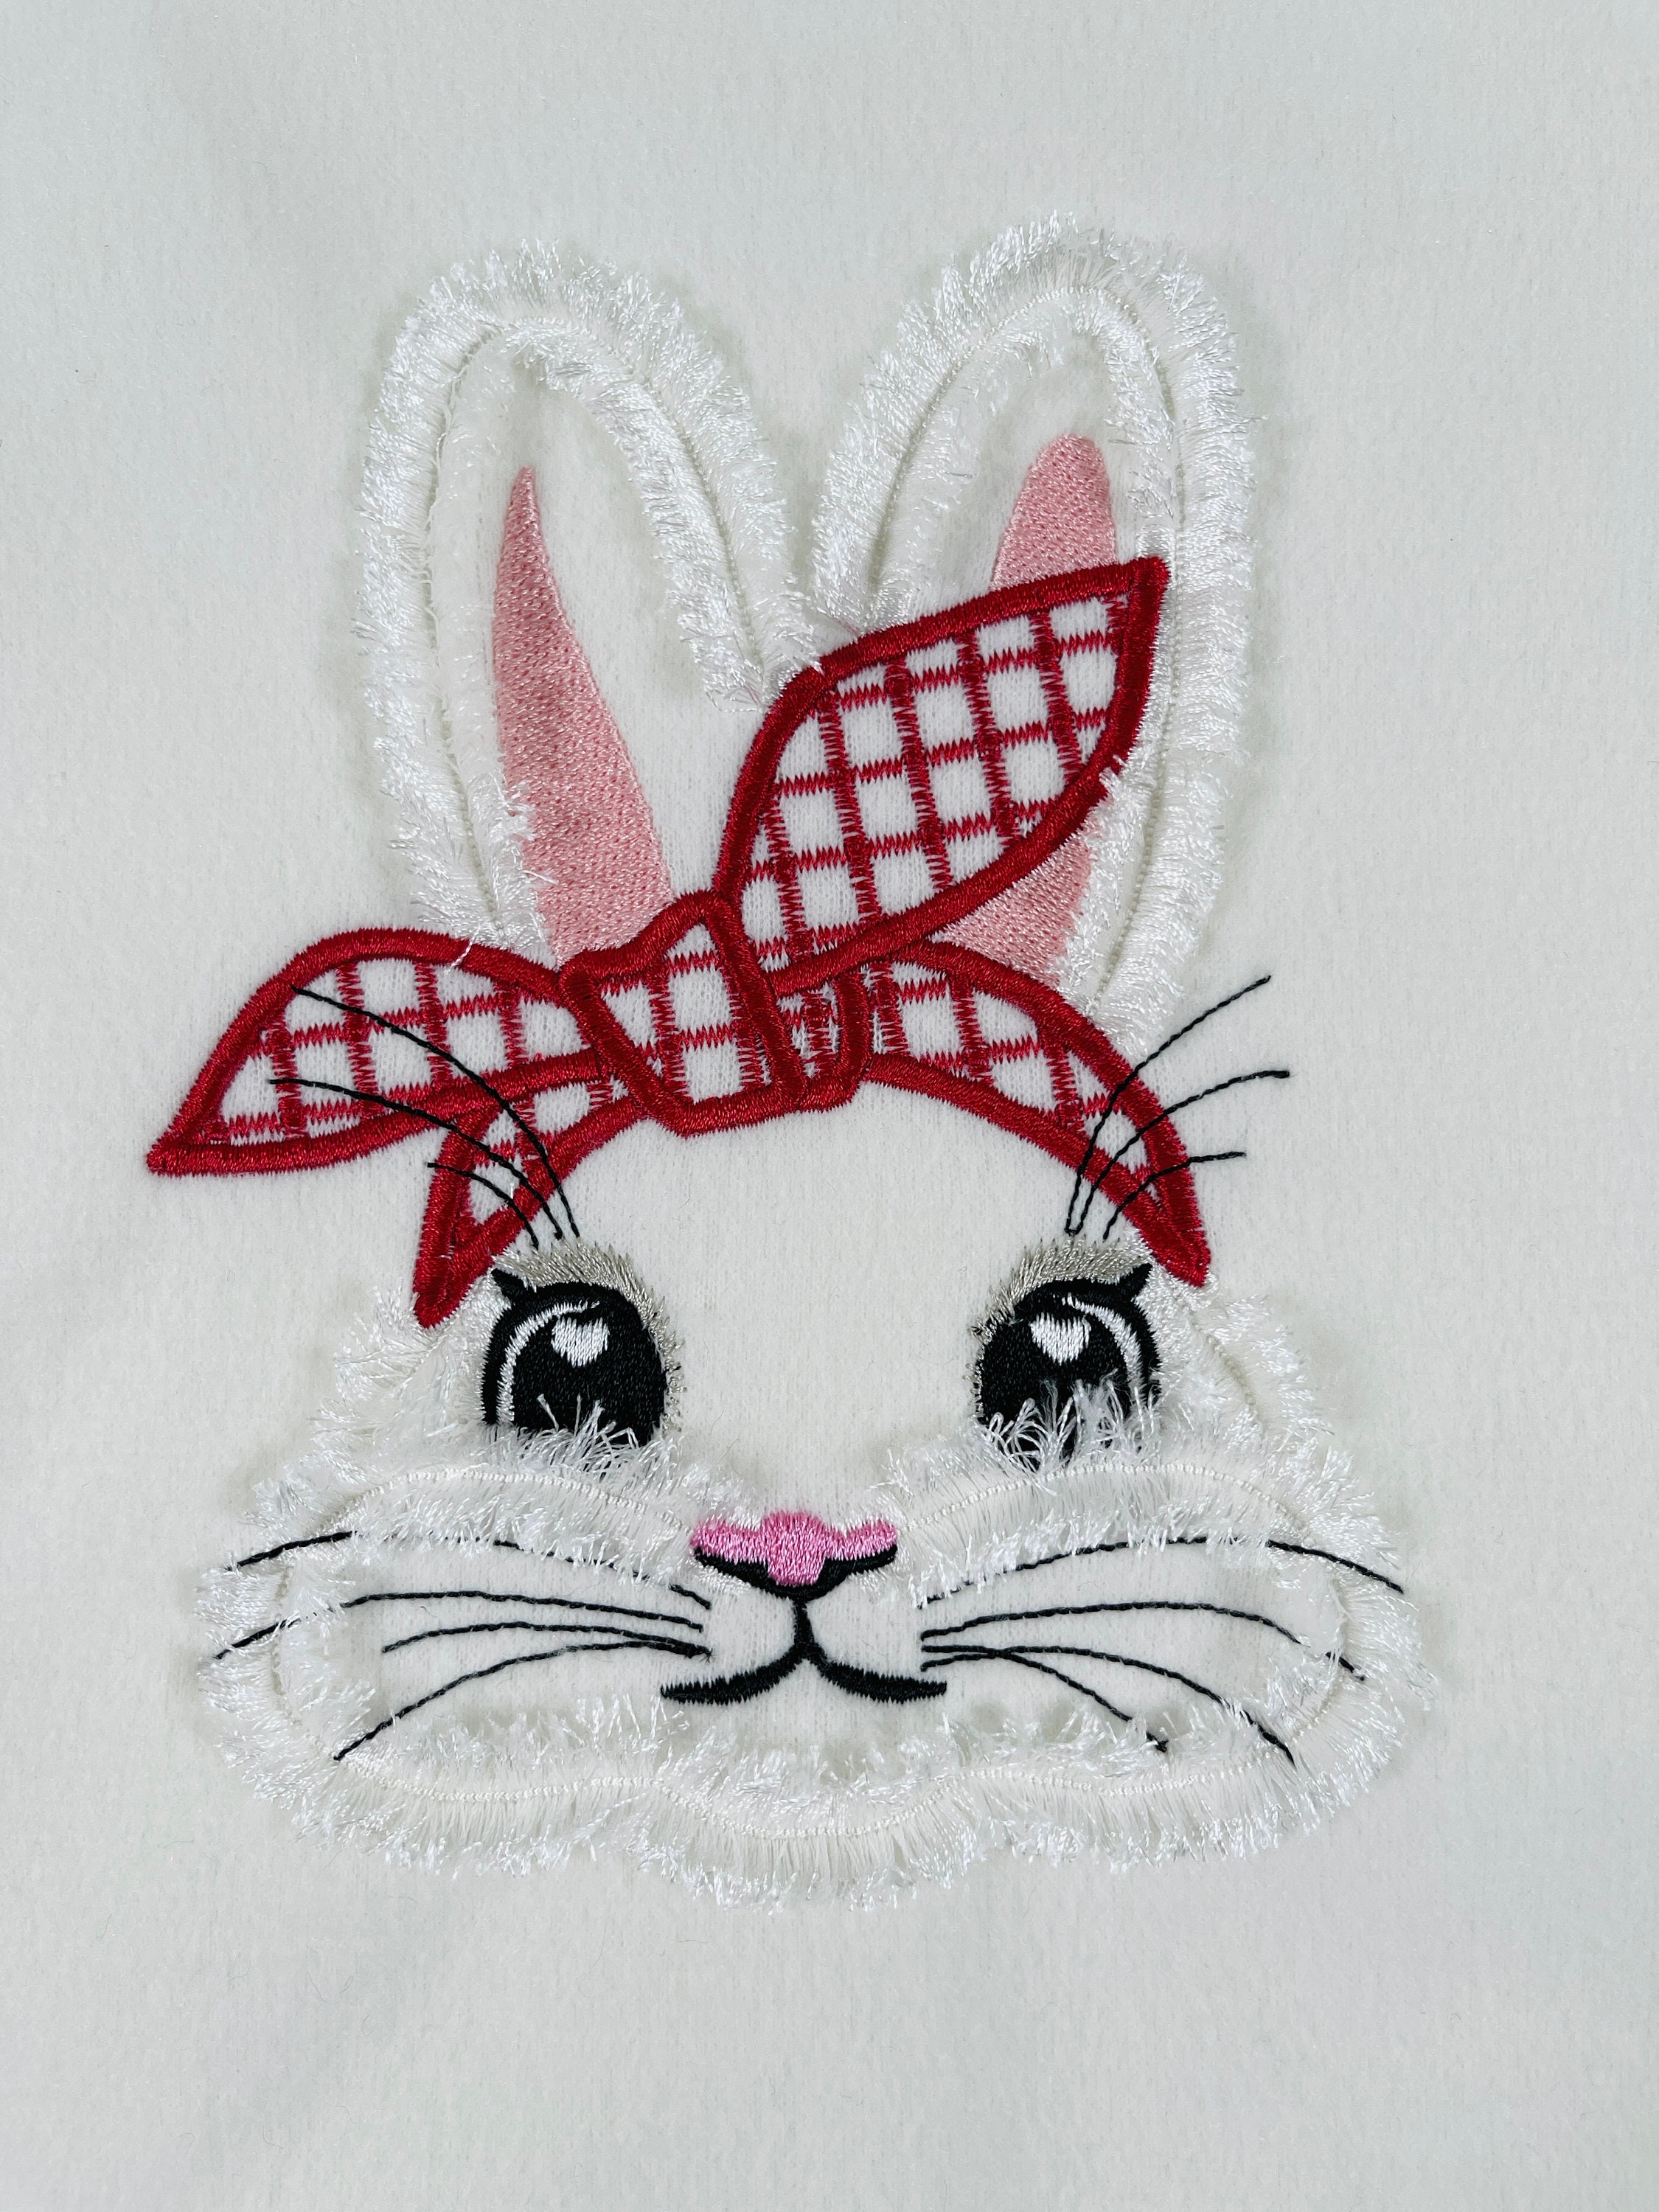
Fringed Bunny Face with Bandanna Embroidery Design
Fringed Bunny Face with Bandanna is an in-the-hoop machine embroidery design for a fluffy bunny face with a checkered bandanna bow. It comes in 6, 7, and 8 inch sizes, uses a fringed finish, and includes embroidery files in PES, DST, EXP, VIP, HUS, XXX, JEF, and VP3 plus PDF thread color charts.
- Fringed bunny face with checkered bandanna
- Finished sizes: 6, 7, and 8 inches
- Safe to tear and wash after stitching
- Instant digital download, not a patch

Scan the QR code to watch the short fringe technique video.
The part I kept adjusting
The longest part to get right was not the bunny face itself. It was the fringe edge and the way the bandanna sits against it. I wanted that fluffy outline to stay soft after you cut the bobbin thread on the back, but I also needed it held down well enough to handle tearing away the stabilizer and washing later. That is why I added a tack seam under the fringe, so the texture stays put instead of shifting around once you start fluffing it up.
The checked bandanna mattered too. A bow this simple can look stiff very fast, so I spent extra time balancing the neat shape of the bandanna against the fuzzy edge of the face.
This design is made for that satisfying last step, when you turn the hoop over and cut along the loose satin areas on the back. Then you turn it to the front again and lift the threads into fluff. It changes the whole look in a minute. The bunny goes from flat stitching to a soft fringed face, and that contrast with the crisp checked bandanna is the whole point of the design.
“This bunny is adorable. It stitched out perfect! I can’t wait to do more of these types of patterns.”
Super Stickdatei. Ich bin begeistert. Diesen Shop kann ich mit gutem Gewissen empfehlen.
Sew amazing! This store is one of my favorites here on Etsy. 🙂
three finished size options
cut the back threads, then fluff
fits many home embroidery machines
Formats for many embroidery machines
You will receive the design in BX, PES, DST, EXP, VIP, HUS, XXX, JEF, and VP3 formats.
- Brother / Baby Lock — PES
- Janome — JEF
- Bernina / Melco — EXP
- Husqvarna Viking — VIP, HUS
- Pfaff — VP3
- Singer — XXX
- Tajima and commercial machines — DST
- Embrilliance — BX
- Fringed Bunny Face with Bandanna embroidery files
- Sizes in 6 inch, 7 inch, and 8 inch versions
- File formats: PES, DST, EXP, VIP, HUS, XXX, JEF, VP3
- PDF thread color charts
- This is a digital embroidery file for an embroidery machine.
- Your files are available as an instant download after purchase.
- You may sell finished items you stitch from this design.
Yes. HUS is one of the included file formats for this design. The format list also includes PES, DST, EXP, VIP, XXX, JEF, and VP3.
I include the design in several common machine formats, but machine setup can vary from one model to another. The safest check is to make sure your machine reads one of the included formats and that the 6, 7, or 8 inch design size fits your hoop.
I recommend a medium-weight non-woven tear-away stabilizer for this one. That gives the design enough support while you stitch and while you cut and fluff the fringe afterward.
Yes. After the design finishes, turn the hoop over and cut the bobbin thread along the large satin stitches on the back. Then turn it to the front and fluff the fringe.
This design uses three stitch types in sequence: placement stitch, tack-down stitch, and satin stitch. The fringe effect comes from the loose satin areas that you cut from the back after stitching.